Monday, July 19, 2010

Over my head


Here's my oldest. Up in a tree. Her own tree now. If her parents weren't hobbits I'd swear that she was a wood elf. I posted this for the iheartfaces weekly challenge "Over My Head".


Wednesday, July 7, 2010

Make your own Cow Ears


To celebrate Chick-Fil-A’s Cow Appreciation Day we are dressing like cows (and hopefully getting a free meal, too!) Unlike last year, when I found out the day of (and had to safety pin black patches over white shirts) I have a couple of extra days to plan ahead, so we’re getting a tiny bit more complex with the cow outfits.

I wasnted to share a little tutorial on how I made several sets of cow ears for my little bovine crew. All the necessary parts I had on hand, use what you have and feel free to substitute what is convenient for you!!You will need:

• 15 inches of grosgrain ribbon, ¾” or 1” width.
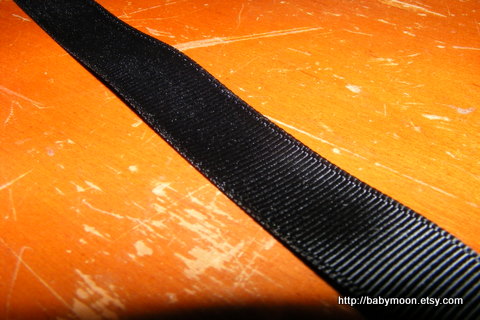
• Upholstery weight fabric, a small amount, ¼ yard or a fat quarter’s worth or scraps. You need to cut it into 4 pieces 8” x 3.5” . I used some black canvas that was on hand. If you are using a quilting cotton you will need to interface it with at least medium weight interfacing to give the ears some body.
• Thread to match (I had no black – we just moved and I’ve gotten a lot of my sewing supplies out, but I haven’t found the black thread yet. I did have navy blue, which was just fine for quick cow ears!)• A small bit of elastic – 5” or less. Using what I had, I took some stretch lace that was black and just bunched it up. You’ll see what I mean in a minute. You could also sew a tube of black fabric and thread elastic through that or use stretchy black elastic for the whole thing. Now that I think about it, I’m quite sure that we could use a black elastic headband and just attach the ears to that, but I didn’t think about that in the beginning.

So, here we go.

From the 8”x3.5” pieces of fabric, cut an ear shape. Taper towards one end so that it comes to a point. I cut all four out at once so that they were all the same. My fabric was the same front and back, but you may need to consider if you have a definite right or wrong side.
Sew around the ear shapes (2 together, right sides together) leaving the short edge open.
Turn inside out, using something to get the point out (chopstick, blunt pencil, something else not-to-pointy). My six and eight year olds turned all mine out while I sewed the others. Delegate whenever possible!

This is quick and dirty sewing, so I didn’t press, but if your OCD like that, go ahead and press. This is Chick-Fil-A, not the state fair!

Bring the opposite corner of the open end of the ear together in the middle, and sew down with a zig-zag. Trim if you need to neaten it all up. Isn’t that a cute little ear?? Repeat to make another ear. Sorry about the blur! (Or repeat as necessary to outfit all the cows you have)


Measure about 5” from the end of the ribbon and attach an ear at that point. Sew with a zigzag stitch just to make sure it can’t get yanked off by a little brother or sister cow. Repeat on the other end of the ribbon, with the other ear headed the other direction for some sweet bovine symmetry.


Now take the elastic, or whatever stretchy stuff you are using and attach it to one end of the ribbon. If this is for girls, the attaching place will most likely be hidden by hair, so don’t get too crazy trying to make this look perfect. I just folded my grosgrain ribbon up and then bunched up the stretch lace until it was the same width as the ribbon and just zigzagged it all together. Do the same on the other end, making sure that nothing is twisted up.

Try it on one of those little cows and soak up the cuteness!
Make another one, and another! Moooo!

Tuesday, May 11, 2010

Cute quilt project

The new episode of the DIY dish came in my email today and I cannot wait to make this cute quilt with the frayed applique flower!


You'll love it too! I'll be sure to post my quilt here as a show and tell!

Thursday, May 6, 2010

Tutorial Coming soon!


I made these tiny snap strap totes to use up some extra fabric that was too good to toss in the scrap bin, but not really usable for any of my other projects.

I love totes of all sizes, and these are SO cute! I'm using one on the handle of my diaper bag now to hold my cell phone, which always seems to get lost in there underneath all the extra diapers, changes of toddler and baby clothes, and other random stuff that mom gets to hold for everyone else. This way my phone is handy and easy to get to, without having to fiddle with extra zippers or velcro in a regular cell phone pouch! Don't know about anyone else, but by the time I could get into one of the other "cell phone cases" I've already missed the call!

There are a few of these coming to my shop, too, but I wanted to share the tutorial as well, since they are SO easy to make!

Monday, April 5, 2010

Sparkle Sparkle!


Just added - some fresh and sparkly jewels in my etsy shop!
Perfect for just about any occasion!


Take a peek and let me know which is your favorite!


Thursday, March 11, 2010

garlands

Since we're living in a rental house right now (and only for a couple of months) I can't bring myself to putting holes in the wall that I'll have to fill and paint over when we move out. It's just not worth it! But I've been a little discontent with the bare walls. So, cricut to the rescue!
I made this cute garland for my craft space:


And this one for my patio:


(Don't laugh - I kill plants and need all the positive input that I can get to help them out!)

Wednesday, March 10, 2010

Cascarones

When my family moved to San Antonio in the early 80's I fell in love with the brightly colored confetti filled eggs that seemed to be everywhere around Easter time. These eggs are meant to be cracked over the head of unsuspecting persons, showering them with confetti that may last for days on their person, or at least for the rest of the day.

Here is some information about cascarones, and even a place where you can purchase ready made cascarones if your local grocery doesn't carry them. Here’s a great painting of a family making their cascarones. I love that boy who’s bored at the table – it’s always someone, isn’t it?

A couple of years ago, while living in a cascarone-free land, I decided to introduce this custom to my children. Having a houseful of said children, we go through eggs like crazy people, so there were plenty of empty eggs to be had for the filling and decoration. Here is my process for making some - maybe you'd like to make your own, too. This is a great activity for a warm spring afternoon that even the littlest ones will enjoy. Aside from the cost of the eggs (which were groceries to start with, so it doesn’t count for “crafting” cost!) this is a nearly free craft using things you most likely have on hand!

You'll need to take care when cracking your eggs to save most of the shell. I have found that the contents are most likely to end up as scrambled eggs or omelets when cracking this way, as the yolk will probably break when you are shaking the contents out. If you crack the smaller end of the egg you will have a smaller hole and a neater cascarone.

Rinse out the remaining goo from the eggshells and set out to try. Shake out any extra water and leave them for a couple of days.


On a side note, I've found that "store eggs" (you know, the eggs you buy at a grocery store as opposed to the eggs you buy from your friends with free range chickens) have thinner shells, which are more fiddly to crack, but which cause less pain to the one upon whose head the cracking is done on. Just saying.)

Store these empty clean and dry eggs somewhere safe so that 1)an ambitious partner doesn't toss them into the bin while he helps clean up the kitchen, 2)so that curious little hands don't do so much cascarone cracking before you have all had a chance to make them into the cascarones. I keep them in a plastic basket on top of the fridge. You probably don't want to put them in sealed zip-style bags, just in case there is a little water or residual egg goo and you find a moldy surprise in a week or two. I keep cracking lots and lots of eggs so I have more than we’re going to end up with because it is inevitable that several get busted in the process. We make lots because there are lots of us in our family, but you should make lots, too, because they are just lots of fun!

Gather the rest of the supplies you need:

  • Confetti (see my note on confetti later)
  • Glue

  • Empty egg cartons

.

I like to have more egg cartons than I'll need in order to keep my little assembly line going smoothly.

  • Tissue paper (whatever was left from the last birthday party is fine – you won’t even use up an entire sheet, probably)
  • Paints (again, whatever you have on-hand - I use acrylic craft paint)
  • Permanent Sharpie-type markers


It's best to work outside, especially for the filling of the eggs.

Stand all your clean, dry, and empty eggs up in the extra egg cartons with the openings that you cracked pointing toward the sky.


Fill the empty shells with a couple of tablespoons of confetti.

Did I mention you should try to do this part, at least, outside?


I distinctly remember the first time when we made them inside. It was not good or fun. This should be fun, so just go outside!


Keep in mind where you will be when you are cracking the cascarones and use confetti that is quick to decompose. Sure, you can use that cute shape confetti from the party supply section with those pretty metallic plastic pieces for a nice sparkly show, but they will be forever embedded in the lawn or driveway or the grandmother's lawn or drive. And no one wants to be picking up confetti parts for the rest of Easter day! One day I hope to get my cascarone making so organized that I can order some of this great confetti in time to make them BEFORE Easter, and not just the week of, like I usually do. Of course, if you really want to get crazy you can make your own confetti , but seriously, I’d be doing all the punching and not get nearly enough for one egg by doing all the punching myself, then the cascarones would never get made, and we’d all be sad. I found tissue paper confetti at a small card and party store that didn’t have plastic in it.

There was this one time when we filled the eggs with birdseed

The cracking was to happen in my own yard, and we didn’t have much grass to grow anyway, and we had plenty of birds to help clean up the birdseed.

Your grandparents may not want sunflowers and millet sprouts in their carpet grass after Easter, so you decide if this option works for you.

Set the eggs upright into those egg cartons when they have their confetti. .

Cut tissue paper from various colors into rough 1 and 1/2 inch or 2 inch squares. Apply some good old Elmer's glue all (school glue works, too, I just like the thickness of the glue-all) around the opening of the egg, being sure none drips to the inside.

Quickly press on a square of tissue paper and set them up in the egg cartons again to let dry.


Once the glue is dry you are ready to decorate the eggs.

Maybe everyone has gone off and you are left alone finishing the eggs. So it might be a good time to close up all the cartons and start another day. You can leave them plain, especially if they've been topped with fancy tissue paper - they already are pretty! But you can get creative with additional decorations, too!

My favorite part is the decorating of the cascarones. The eggs which have been filled with confetti and closed with the tissue paper can be decorated in endless ways. In the past we have painted the ends as flowers, polka-dotted them, painted cute spring motifs (bunnies, snails, flowers) or painted them all with pastels or metallic paints.

This past year we made lots of extra eggs so I didn’t get to obsessive with the painting. This was probably the most fun, because I didn’t do all of the extra work of going back over everyone else’s eggs with my painting to neaten them all up (I mean, they are going to get cracked anyway! See how relaxed I am about the whole process now?)

You can see lots of other people’s painted cascarone’s here and here, in case you have time to accomplish something on a grander scale. I have a feeling that this loose painting will be our standard for the next few years, until my little painters either grow out of the tradition or decide to paint more intricately themselves

Acrylic paints work well for this (be sure to wear aprons because acrylic paint does not come out easily when dried).

Watercolors would probably work, too, but I don't know how well the egg surface will hold the thin color paint.


Another side note - the more layers of paint are applied will definitely affect the "crackability" of your cascarone. (I think I just made up a new word, again!) That means more pain for the upon whose head the cascarone is cracked. So use a light touch with the paint!


See here - thick paint + zealous brothers leads to tears on Easter afternoon. Keep the paint to a minimum!


To add finer details, use a permanent sharpie-type marker to outline or accent areas of your painting once the paint has dried.

Put all the eggs back into their cartons to store them until your appointed egg-cracking time. Ours is usually after the finding of the eggs on Easter Sunday afternoon, but really, any springtime gathering is a good time for cascarones!


Thanks for reading and have a truly wonderful Easter celebration!!

Friday, February 19, 2010

Diapers

I broke down and bought a package of paper diapers today.

What I should have done instead of lugging 3 reluctant big kids, one eager not-big-but-not-really-little-anymore kid, a very reluctant preschooler, an indifferent and heavy toddler and the baby-who-at-any-moment-would-like-to-nurse-whether-or-not-it's-convenient to the grocery market is dug around in the boxes that have yet to be unpacked to find the cloth diapers which have plenty of life left in them.

I blogged about my diaper system over here a couple of years ago, but since our move, I don't have a convenient cloth diapering area. Really, I should just get over it and clear out the baby bed that Jude doesn't sleep in and use that as a changing area and set up a little plastic bin for holding dirties until they are ready for the wash.

I'm almost ashamed to post such rambling run-on sentences. But it is late, can that be my excuse? And I am somewhat frazzled from taking the children to the store and answering the same questions yet again. (Yes, they are all mine. No, I don't have a daycare [as if I need to torture other people's children by dragging them out on errands, too!]. Yes, they are very well-mannered - probably because I've bribed them with a lunch out!)

Perhaps instead of finding the other diapers I should sew some new ones. I did find two boxes of lovely flannel and can make up flat diapers in no time at all. I made some really cute newborn sized ones from these instructions, and she has instructions for regular sized flats as well.

The diapers I have packed away from the move are mostly from the Ottobre Designs pattern and from the Chloe Toes pattern. On my last go-round with cloth, I really liked the inners made from flannel and the covers from PUL (polyurethane laminate), separate diapers from flannel and the covers from PUL. For a while I was using pocket diapers, but I got all freaky about wet polyester touching new baby skin, then tried wool covers, but never got that quite right. I think in this hotter climate, though, wool won't be as hard to use (it was that it was colder and I felt like I had to keep baby bundled up, so the compression of the wool with clothes on top caused more leaks than I liked. Here, baby can have air circulating with less clothes, leading to fewer wet outfits.

Well, I think that's enough motivation for me to get up and get busy, no?

Saturday, February 13, 2010

Lovebugs!


We made some adorable little Valentine's cards for the children to pass out to their friends on Valentine's Day.

Using the Cricut machine, we cut square cards at 2 1/2 inches from the Platin Schoolbook cartridge from assorted colors of cardstock.


Then we cut ladybug backs from the Paisley Cartridge at 2" on black cardstock using the Button Feature from the "Boots" and the circle with Heart cutout from the Shift-Button Feature on "Boots" on red cardstock.Hmmm, looks like my mats need cleaning!


The children LOVED putting the LOVEbugs together and made ooodles of them for their
friends.
They gave quite a few out to grandparents and cousins two days before Valentine's Day, so we had to make some more and have another lovebug session today!


Wednesday, February 10, 2010

New from You Can Make This.com


Welcome to "The DIY Dish!" (WIN a Sewing or Embroidery Machine!)


It's no secret that I love the YouCanMakeThis.com website! It is full of great patterns and ideas. Now YCMT is starting a new blog/show called the DIY Dish and to celebrate (and spread the word) they are giving away two new sewing machines - and one of them embroiders!!

Head over there and check it out! And be sure to sign up for their newsletters so you always know when they have a new feature!

P.S. - You can also go to their site from the new DIY Dish button on the side of my blog!

Sunday, January 17, 2010

Hey Jude


A few new pictures of our latest bundle.

I wish 4 months old would last forever! Such a sweet age!